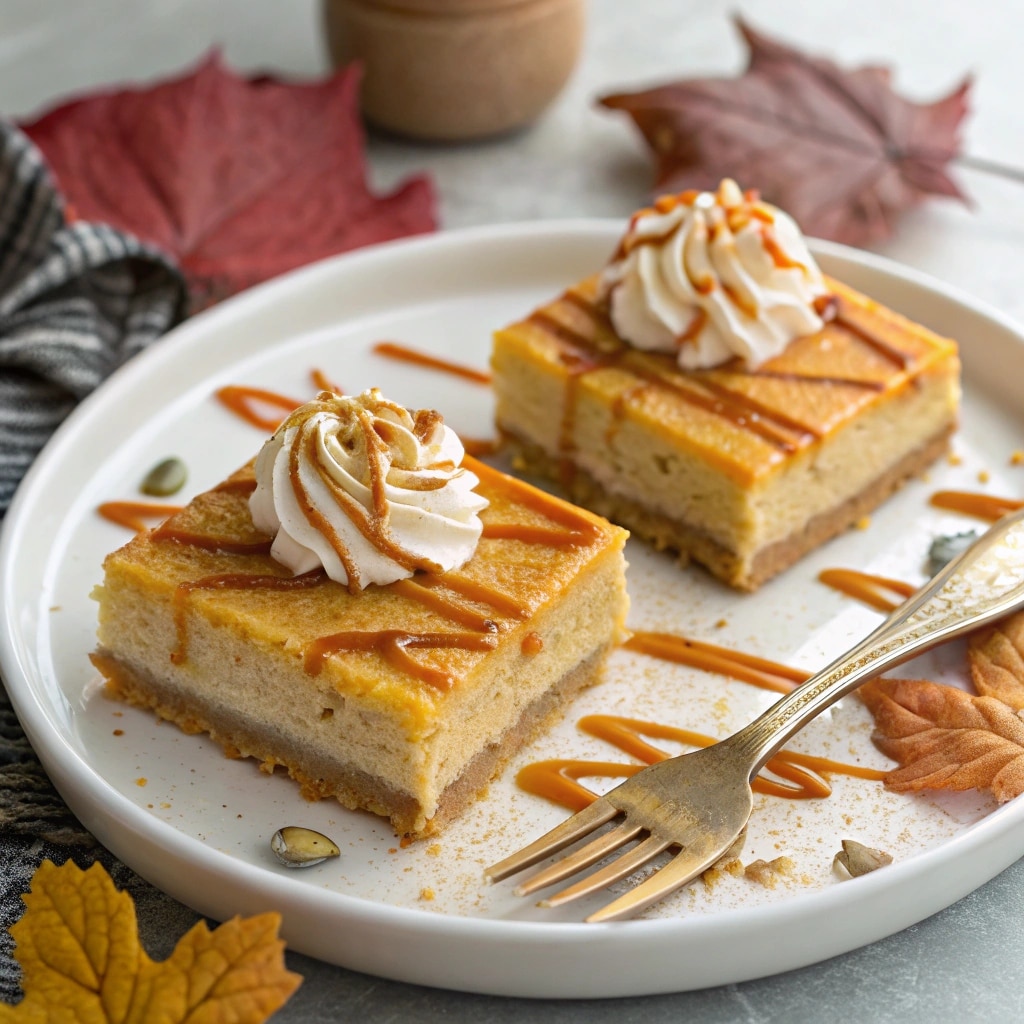
The scent of pumpkin spice and warm ovens fills my kitchen every fall. There’s just something about it that wraps me up in cozy nostalgia. I still remember the first time I baked a pumpkin pie—it cracked right down the center, the crust shrank, and I nearly cried. But I didn’t give up. That experience is exactly why I now swear by these pumpkin pie bars.

They’ve got all the flavor of a classic pie—creamy pumpkin filling, warm spices, buttery crust—but with none of the pie drama. No fragile pastry, no soggy bottoms, and no stress. It’s one of those simple pumpkin recipes I can turn to every fall when I want something impressive yet totally approachable. And trust me, these are easy pumpkin bars even beginners can bake with confidence.
When I first developed this recipe, I was inspired by my Best Pumpkin Pie Recipe. I loved that rich custard flavor but wanted something I could slice into neat little squares and serve at potlucks or freeze for later. That’s when I realized that pumpkin dessert bars were the answer. Now, I make these for everything from family dinners to school bake sales. They’re truly one of the best pumpkin desserts I’ve ever made—and I think you’ll agree.
So grab your mixing bowl, line your pan, and let’s make the fall baking process feel like a breeze. These pumpkin pie bars are about to become your go-to treat all season long.
Table of Contents
Why You’ll Love These Pumpkin Pie Bars
I’ve made a lot of pumpkin desserts over the years, but these bars? They’re the kind of treat I make once—and then again and again because everyone keeps asking for them. There’s just something about the buttery graham cracker crust paired with that silky, creamy pumpkin filling that makes people light up when they take a bite. The texture is soft, custardy, and perfectly spiced—exactly what I love in holiday pumpkin desserts.
Classic Flavor, Without the Fuss
Let’s be honest—making a traditional pie can be stressful. Rolling out dough, transferring it to a pan without tearing, praying the crust doesn’t shrink or the filling doesn’t crack… it’s a lot. That’s why I love these pumpkin pie bars. They bring the same comforting flavor as a classic pie but skip the drama. The graham cracker crust is buttery and easy to press into the pan, and the filling comes together in minutes.
What you get is all the joy of pumpkin pie in a form that’s so much easier to bake, slice, and serve. I even adapted this recipe once for a friend who avoids gluten by using almond flour in the crust—she said it tasted just as amazing. If you’re looking for a similar alternative, you might love my gluten-free pumpkin pie too.
Shareable, Make-Ahead, and Totally Reliable
These bars are the definition of make-ahead pumpkin bars. I bake them the day before Thanksgiving, pop them in the fridge overnight, and they slice beautifully the next day. They hold up great for potlucks, school events, or just stashing in the freezer for those crisp afternoons when you need a little comfort.
And unlike traditional pie, these won’t collapse or weep after a few hours. They’re sturdy, portable, and still melt-in-your-mouth delicious. For anyone who loves fall dessert recipes but not the stress of perfect presentation—these bars are your answer.
Ingredients You’ll Need
One of the best things about pumpkin pie bars is how simple the ingredient list is. Most of what you need might already be in your pantry—and if not, everything is easy to find during fall baking season. I’ve tested this recipe with both standard and dairy-free options, and every version still turns out like those comforting baked pumpkin treats we all crave once the leaves start turning.
Here’s everything you’ll need to make these simple pumpkin recipes shine:
For the Crust:
- 1½ cups graham cracker crumbs (use gluten-free if needed)
- 6 tablespoons butter, melted
- ¼ cup granulated sugar
For the Pumpkin Filling:
- 1 (15-ounce) can pumpkin puree (or 1¾ cups fresh puree)
- 3 large eggs
- 1 (12-ounce) can evaporated milk
(or full-fat coconut milk for dairy-free) - ½ cup brown sugar
- ¼ cup granulated sugar
- 2 teaspoons pumpkin pie spice
- 1 teaspoon ground cinnamon
- ½ teaspoon ground nutmeg
- ¼ teaspoon ground ginger
- ⅛ teaspoon ground cloves
- 1 teaspoon vanilla extract
Optional Toppings:
- Whipped cream
- Cream cheese swirl (just dollop and swirl before baking!)
- Caramel drizzle
Sometimes when I have leftover pumpkin after making these bars, I’ll whip up a batch of Pumpkin Muffins the next morning. That way, nothing goes to waste—and it keeps the fall vibes going.
These ingredients come together into one glorious, spiced custard bar that’s as festive as it is foolproof. Up next, I’ll walk you through how to put it all together.
Print
Pumpkin Pie Bars
- Total Time: 80 minutes
- Yield: 16 bars 1x
- Diet: Vegetarian
Description
Pumpkin pie bars combine the creamy filling of classic pumpkin pie with an easy graham cracker crust, perfect for make-ahead fall desserts.
Ingredients
For the Crust:
- 1½ cups graham cracker crumbs (gluten-free if needed)
- 6 tablespoons butter, melted
- ¼ cup granulated sugar
For the Filling:
- 1 (15-ounce) can pumpkin puree
- 3 large eggs
- 1 (12-ounce) can evaporated milk
- ½ cup brown sugar
- ¼ cup granulated sugar
- 2 teaspoons pumpkin pie spice
- 1 teaspoon ground cinnamon
- ½ teaspoon nutmeg
- ¼ teaspoon ginger
- ⅛ teaspoon cloves
- 1 teaspoon vanilla extract
Optional Toppings:
- Whipped cream
- Caramel drizzle
- Pecans or cream cheese swirl
Instructions
1. Preheat oven to 350°F. Line a 9×13 pan with parchment.
2. Mix graham cracker crumbs, butter, and sugar. Press firmly into pan.
3. Whisk pumpkin puree, eggs, evaporated milk, sugars, vanilla, and spices.
4. Pour filling over crust and smooth top.
5. Bake 60–70 minutes, until edges set and center jiggles slightly.
6. Cool completely, then chill at least 4 hours before slicing.
7. Top with whipped cream, caramel, or pecans before serving.
Notes
Make ahead: Bake a day early and refrigerate overnight.
Freezing: Wrap tightly in plastic and foil, freeze up to 2 months.
Variations: Gluten-free, vegan, or cheesecake swirl versions.
- Prep Time: 15 minutes
- Cook Time: 65 minutes
- Category: Dessert
- Method: Baking
- Cuisine: American
Nutrition
- Serving Size: 1 bar
- Calories: 200
- Sugar: 15g
- Sodium: 120mg
- Fat: 9g
- Saturated Fat: 5g
- Unsaturated Fat: 3g
- Trans Fat: 0g
- Carbohydrates: 27g
- Fiber: 2g
- Protein: 4g
- Cholesterol: 45mg
Step-by-Step – How to Make Pumpkin Pie Bars
When I’m craving that cozy fall flavor but don’t want to fuss with pie dough, these pumpkin pie bars are my go-to. The process is straightforward, and the results are always a hit—creamy pumpkin filling, buttery crust, perfectly spiced bites. Here’s exactly how I make them every time:
Step 1: Prep Your Pan and Preheat the Oven
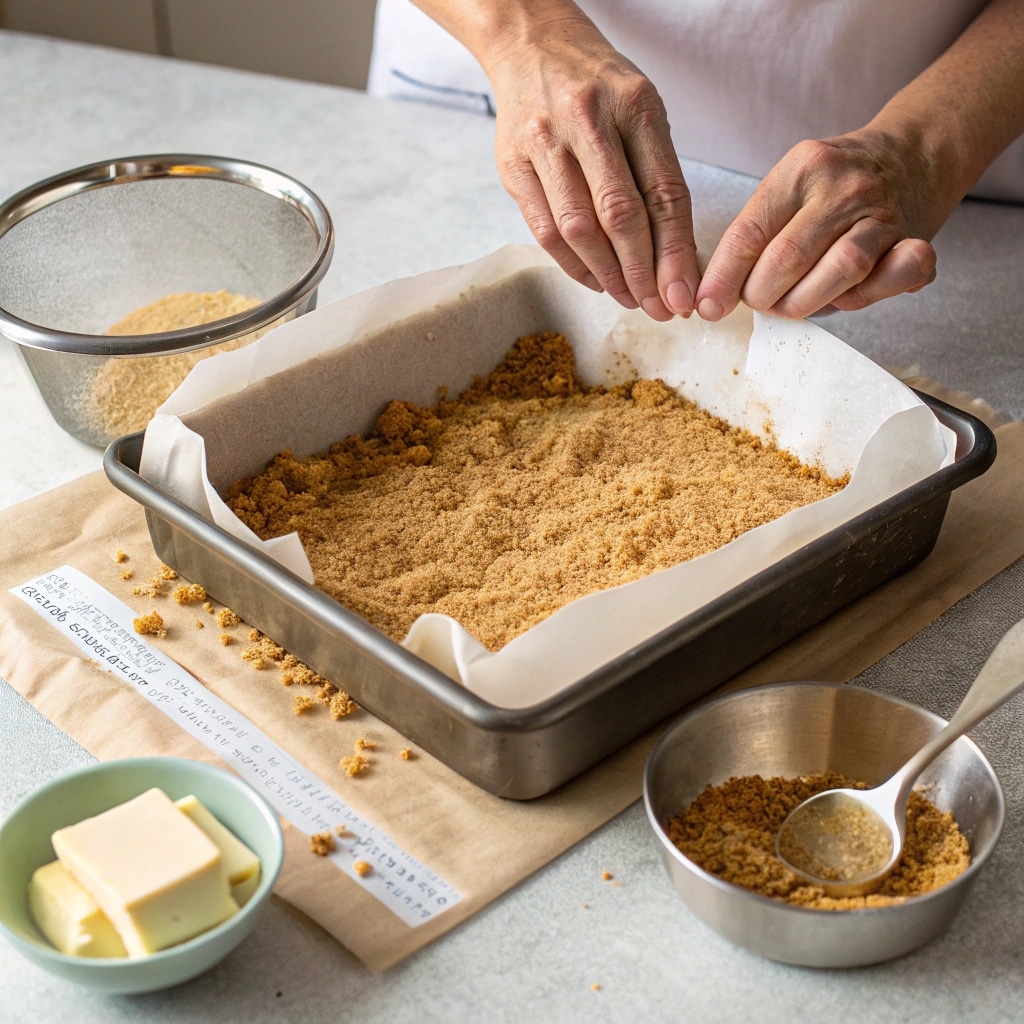
Start by preheating your oven to 350°F (175°C). Line a 9×13-inch baking dish with parchment paper, letting some hang over the sides. It makes lifting the bars out so much easier later on—trust me, you’ll thank yourself.
Step 2: Make the Crust
In a medium bowl, mix the graham cracker crumbs, melted butter, and sugar until the texture feels like wet sand. Press the mixture firmly into the bottom of the lined pan. Use the bottom of a measuring cup to pack it tightly—it helps keep that base crisp.

Step 3: Whisk the Pumpkin Filling
In a large bowl, whisk together the pumpkin puree, eggs, evaporated milk, both sugars, vanilla, and all those warm spices: cinnamon, nutmeg, ginger, cloves, and pumpkin pie spice. You want a smooth, slightly thick batter with that beautiful fall aroma.
Step 4: Pour and Bake
Pour the filling over the crust and smooth out the top. Pop it into the oven and bake for about 60–70 minutes. The edges will set and the center should jiggle slightly—like a soft-set custard.
Step 5: Cool and Chill
Here’s the hardest part: wait. Let the bars cool completely at room temperature, then chill in the fridge for at least 4 hours (overnight is even better). This sets the filling and gives you those neat, clean slices.
Once chilled, slice into squares, top with whipped cream if you like, and enjoy the cozy comfort of one of the best fall dessert recipes around.
How Do I Know When My Pumpkin Pie Bars Are Done Baking?
This step used to trip me up every time. I’d pull the bars too early, or worse—overbake them and lose that dreamy creamy pumpkin filling texture. But here’s what I’ve learned after a dozen batches in my home kitchen.
Start checking your pumpkin pie bars around the 65-minute mark. Using an oven mitt, gently give the pan a wiggle. You’re looking for just a slight jiggle in the center—kind of like Jell-O. If the whole top still moves like a wave, it needs more time. But if only the middle wobbles slightly while the edges are set, you’ve nailed it.
Don’t worry if the top looks a little puffy—it’ll settle as it cools. And trust me on this: easy pumpkin bars need to rest. I know it’s hard not to dive in right away, but letting them cool at room temperature, then chill in the fridge, is key to firm, clean slices. That cooling time allows the custard to fully set and brings out those warm spices even more.
So be patient—the reward is worth it. Every bite will be rich, smooth, and perfectly spiced, just the way a good pumpkin dessert bar should be.
How Do You Store Pumpkin Pie Bars?
Since these pumpkin dessert bars are made with eggs and dairy, they need refrigeration. Just cover the pan tightly with foil or transfer slices to an airtight container, and they’ll keep for 3–5 days in the fridge. Don’t panic if you see a little condensation on top after chilling—temperature changes can cause that. A quick dab with a paper towel makes them look as good as new.
What About Freezing… Can These Pumpkin Bars Be Frozen?
Absolutely. Cool the bars completely first, then wrap the pan in plastic wrap followed by a layer of foil. You can freeze them for up to two months. When you’re ready to serve, let them thaw in the refrigerator for a full 24 hours. They taste just as creamy and comforting after freezing, which makes them a true make-ahead pumpkin bar option for busy holidays.
Why Use Evaporated Milk?
Evaporated milk is one of my secret ingredients for these easy pumpkin bars. It’s thicker than regular milk and adds that creamy, custardy flavor without the heavy fat of cream. Some recipes use sweetened condensed milk, which works too—but if you go that route, reduce the sugar in the filling. For a dairy-free twist, full-fat coconut milk works beautifully and keeps that rich, silky texture.
Pro Tips for Perfect Pumpkin Pie Bars
Over the years, I’ve baked pumpkin pie bars for everything from cozy family dinners to bustling holiday potlucks, and these simple tricks guarantee success every time. Whether you’re making easy pumpkin pie bars for the first time or perfecting your go-to holiday pumpkin pie bars, these tips will help you bake with confidence.
Use canned pumpkin for consistency.
Canned pumpkin delivers a smooth, reliable base for pumpkin pie bars. Fresh pumpkin purée can vary in texture and moisture, which sometimes makes the filling too soft. For beginners, canned pumpkin is the easiest way to achieve that creamy pumpkin filling we all love.
Don’t skip parchment paper.
Line your pan before baking pumpkin pie bars. It’s a small step that makes a big difference when it comes to lifting out the bars and slicing them into clean, bakery-worthy squares.
Bake until just set.
Pumpkin custard can crack if overbaked. For the best pumpkin pie bars, look for edges that are firm while the center has a slight jiggle. That custardy texture is what makes these fall dessert recipes so irresistible.
Chill before cutting.
Easy pumpkin pie bars slice beautifully once fully chilled. Refrigerate them for at least 4 hours (overnight is even better) for clean edges and a flavor that’s perfectly balanced.
Variations to Try
One of the best things about pumpkin pie bars is how flexible they are. You can keep them classic, or you can get creative and make a new version every time you bake. Here are some of my favorite twists on traditional pumpkin pie bars that turn them into standout holiday desserts:
Gluten-Free Pumpkin Pie Bars
Swap in gluten-free graham crackers or an almond flour crust to make pumpkin pie bars everyone can enjoy. The filling stays just as creamy, and you won’t miss the traditional crust one bit.
Vegan Pumpkin Pie Bars
These easy pumpkin pie bars can go dairy-free and egg-free with full-fat coconut milk and flax eggs. The result is still rich, custardy, and every bit as spiced as classic pumpkin pie bars.
Caramel Pecan Pumpkin Pie Bars
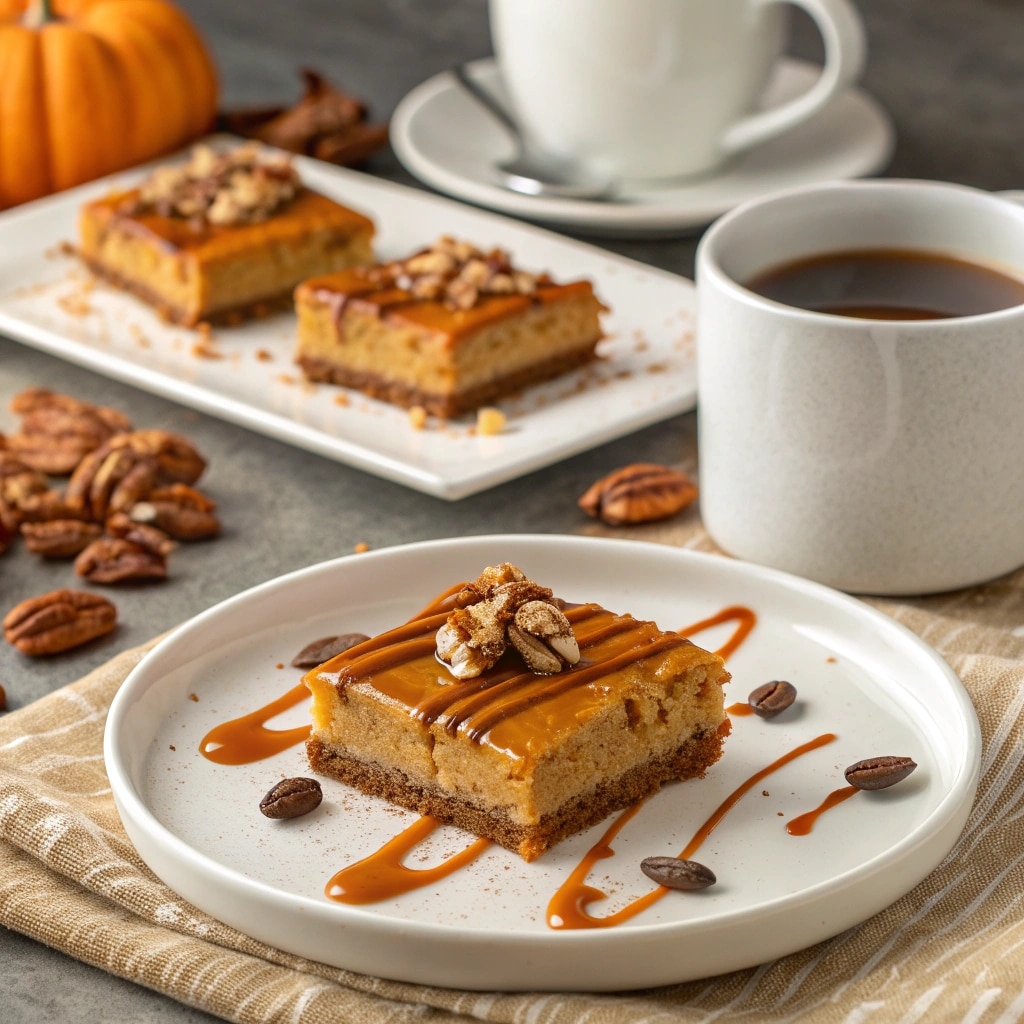
If you want to turn your bars into holiday pumpkin pie bars worthy of a party, try sprinkling chopped pecans over the filling and drizzling with caramel before baking. The nutty crunch pairs perfectly with the silky pumpkin custard.

Cheesecake Pumpkin Pie Bars
For a luscious twist, swirl softened cream cheese into the filling before baking. These pumpkin pie bars take on a cheesecake-like richness that makes them extra special for Thanksgiving or holiday gatherings.
If you’re as obsessed with pumpkin spice treats as I am, you might also love my Pumpkin Cookies with Cream Cheese Icing. They’re the perfect way to keep the fall baking fun going once your pumpkin pie bars have disappeared.
FAQs About Pumpkin Pie Bars
How long does it take to cool pumpkin pie bars before refrigerating?
Pumpkin pie bars need about 2 hours to cool at room temperature before they’re ready for the fridge. Once cooled, cover them tightly and refrigerate for at least 4 hours (overnight is best) to set the creamy pumpkin filling.
How long do pumpkin pie bars last?
Stored in an airtight container, pumpkin pie bars will keep in the refrigerator for up to 4 days. They’re a perfect make-ahead pumpkin dessert because the flavor actually deepens after a day of chilling.
Can I freeze pumpkin pie bars?
Yes, pumpkin pie bars freeze beautifully. After cooling, wrap tightly in plastic and foil, then freeze for up to 3 months. Thaw overnight in the fridge before serving, and add whipped cream or caramel drizzle just before slicing.
When should I cut pumpkin pie bars?
For the neatest slices, wait until the pumpkin pie bars are completely chilled. At least 4 hours in the fridge is required, but overnight chilling makes them slice cleanly into those bakery-style squares.
Final Thoughts
Pumpkin pie bars are proof that holiday baking doesn’t have to be complicated to be delicious. They capture all the flavor of a classic pumpkin pie but in a form that’s easier to bake, slice, and share. Whether you’re making easy pumpkin pie bars for a cozy weeknight, gluten-free pumpkin pie bars for a family gathering, or cheesecake pumpkin pie bars for a Thanksgiving crowd, you’ll always end up with a dessert that feels special.
These bars have become one of my go-to fall dessert recipes because they’re reliable, make-ahead friendly, and always a hit at the table. So next time the craving for pumpkin spice hits, skip the fuss of pie crust and bake a pan of creamy, custardy pumpkin pie bars. I promise—they’ll become one of your favorite holiday pumpkin desserts too.
Follow me on Facebook and Pinterest where I share cozy, easy-to-make baking recipes just like this one.
