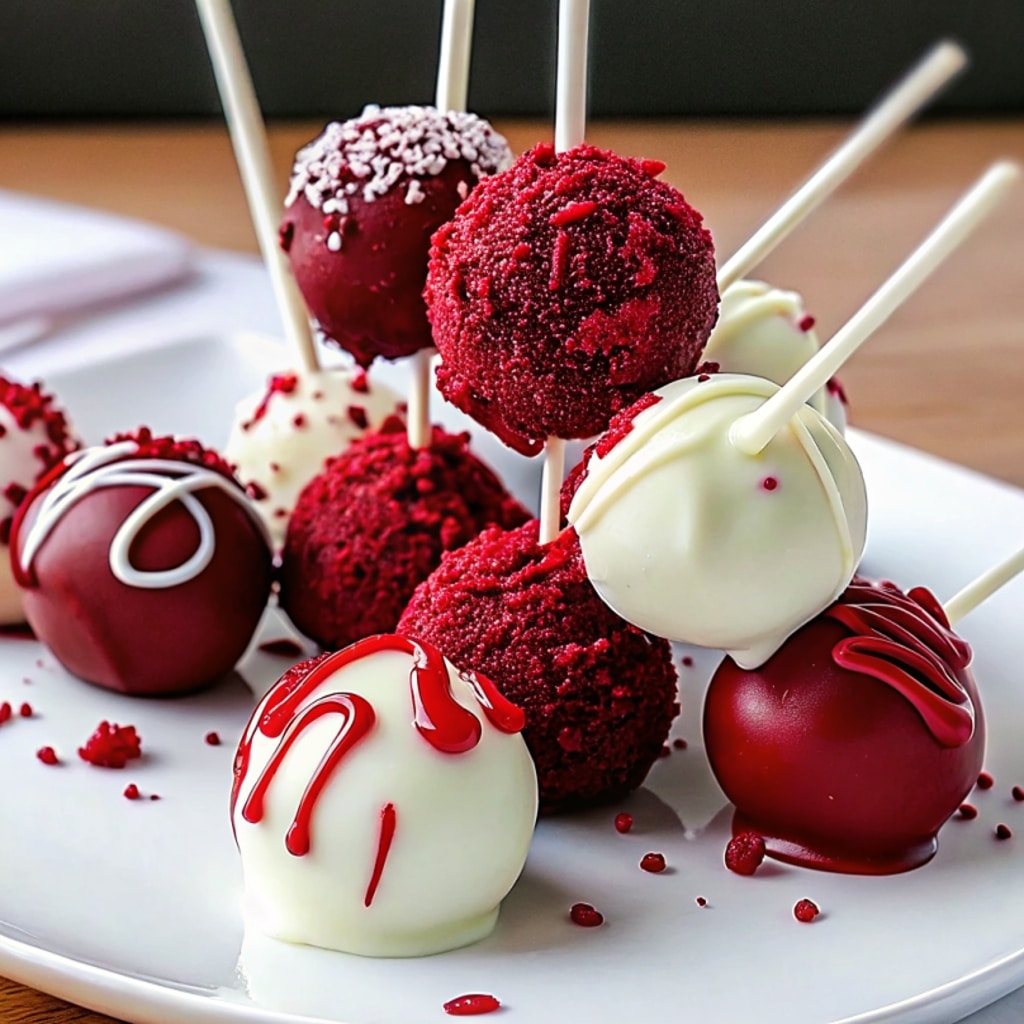
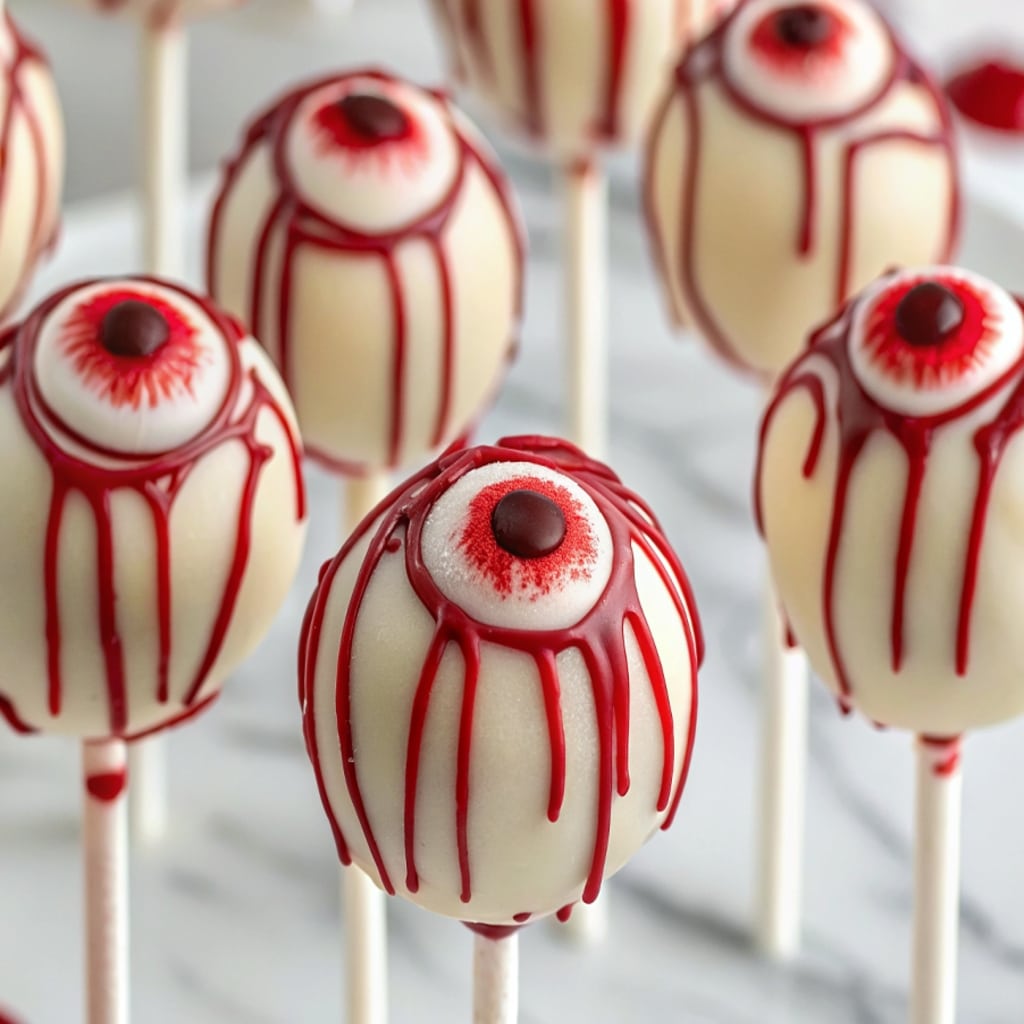
Halloween is the perfect excuse to transform classic desserts into creepy, bite-sized treats. Bloody Red Velvet Cake Pops are the ultimate spooky dessert—scary on the outside, but sweet, fudgy, and irresistible on the inside.

These festive pops start with moist red velvet cake mixed with cream cheese frosting, rolled into balls, and dipped in a white chocolate coating. A drizzle of red candy melts creates the “bloody” finish, making them the star of any Halloween table. Whether you’re hosting a big party or just want a fun kitchen project, Bloody Red Velvet Cake Pops are easy, festive, and unforgettable.
If you love red velvet, don’t miss our Red Velvet Waffle Cake or Red Velvet Cake Oreo Cookies. Both desserts carry that signature red velvet flavor and can be easily dressed up for holiday fun.
Table of Contents
Why You’ll Love Bloody Red Velvet Cake Pops
There are so many reasons to add these creepy-cute treats to your Halloween menu:
- Spooky & Fun → The bloody drizzle makes them a conversation starter.
- Small & Shareable → Bloody Red Velvet Cake Pops are bite-sized, perfect for serving to kids or large groups.
- Visually Stunning → The bright red center creates a dramatic Halloween effect.
- Make-Ahead Friendly → Prepare in advance and store until the party.
- Customizable → Decorate them as eyeballs, mummies, or monsters for endless variations.
Ingredients
- 1 box red velvet cake mix (plus ingredients listed on box)
- ½ cup cream cheese frosting (homemade or store-bought)
- 2 cups white candy melts (for coating)
- ¼ cup red candy melts or red gel icing (for “blood”)
- Cake pop sticks
- Optional: candy eyes, black sprinkles, Halloween sprinkles
Step-by-Step Instructions
- Bake Cake → Bake red velvet cake according to package directions. Cool completely.
- Crumble Cake → Break into fine crumbs in a large bowl.
- Mix with Frosting → Add cream cheese frosting, mixing until dough-like.
- Shape Pops → Roll into 1-inch balls and place on a baking sheet. Chill 1 hour.
- Insert Sticks → Dip each cake pop stick in melted white chocolate, insert into balls, and chill again.
- Coat in Chocolate → Dip cake pops in melted white candy melts until coated. Let set.
- Add “Blood” → Drizzle red candy melts or gel icing over pops to look like dripping blood.
- Decorate & Serve → Add candy eyes or sprinkles. Once set, your Bloody Red Velvet Cake Pops are ready to be displayed on your Halloween dessert table.
How to Serve Bloody Red Velvet Cake Pops
These cake pops are a fun, festive treat that can be served in many creative ways:
- Dessert Table Centerpiece → Arrange them upright in a foam block or cake pop stand for a striking Halloween display.
- Party Favors → Wrap individually in clear treat bags tied with black or orange ribbon. Perfect for handing out at parties or as trick-or-treat goodies.
- Plated Treats → Place on a spooky-themed platter with fake spider webs, candy corn, or gummy worms for added Halloween flair.
- Paired with Drinks → Serve alongside hot cocoa, apple cider, or pumpkin spice lattes for a cozy Halloween gathering.
- In a Variety Tray → Mix with brownies, cookies, and mini cupcakes for a Halloween dessert party platter.
For an unforgettable party, build a dessert bar with Bloody Red Velvet Cake Pops at the center, surrounded by other spooky desserts like Chocolate Pumpkin Cupcakes and Marshmallow Rice Bubbles Halloween Brains.
How to Store Bloody Red Velvet Cake Pops
One of the best things about cake pops is how well they keep, making them perfect for party prep:
- Room Temperature → Store in an airtight container for up to 2 days if your kitchen is cool.
- Refrigerator → Keeps fresh for up to 1 week. Store in a single layer with parchment between pops.
- Freezer → Freeze undecorated pops for up to 2 months. Thaw in the fridge overnight, then decorate before serving.
Extra Tips:
- Keep pops upright in a container to avoid flat spots.
- Wrap individually if storing longer than a couple of days.
- If freezing, avoid condensation by thawing slowly in the fridge before bringing to room temperature.
Make these pops 2–3 days ahead of your party to reduce stress and ensure your spooky dessert table is ready to go.
Tips to Make Bloody Red Velvet Cake Pops
Getting cake pops just right can be tricky. Follow these tips:
- Cake Texture → Don’t add too much frosting. You want a dough-like texture, not mushy.
- Chill Properly → Refrigerate balls before dipping to prevent them from falling apart.
- Use Candy Melts → They coat evenly and set quickly compared to regular chocolate.
- Thin the Chocolate → Add a teaspoon of coconut oil if the coating is too thick.
- Decorate While Wet → Add sprinkles, candy eyes, or red drizzle before the coating fully sets.
- Get Creative → Turn them into mummies, eyeballs, or monster pops with just a few decorations.
For the best “bloody effect,” use red gel icing for dripping lines, or mix red food coloring with corn syrup for a realistic shine.
Variations of Bloody Red Velvet Cake Pops
You can easily adjust this recipe to fit your Halloween theme:
- Eyeball Cake Pops → Use candy eyes and red gel icing for veins.
- Mummy Cake Pops → Drizzle extra white chocolate in stripes for a wrapped look.
- Monster Cake Pops → Use green candy melts and top with candy eyes.
- Pumpkin Cake Pops → Swap red velvet for pumpkin cake and coat with orange candy melts.
- Simple Halloween Pops → Skip the “blood” and use Halloween sprinkles instead for a kid-friendly version.

Want a mix of spooky and cute? Make half bloody and half decorated with fun Halloween colors so your tray has something for everyone.
FAQs
1. Can I make these without cake mix?
Yes—use homemade red velvet cake if you prefer.
2. How do I keep cake pops from falling off sticks?
Chill them well and dip the stick in melted chocolate before inserting.
3. Can I make them dairy-free?
Yes—use dairy-free frosting and vegan candy melts.
4. Do I need a cake pop stand?
Not necessary. You can poke holes in a foam block or cardboard box to hold them upright.
Final Thoughts
Bloody Red Velvet Cake Pops are the perfect balance of spooky and fun. They’re small, portable, and easy to decorate, making them a go-to choice for Halloween parties. With their fudgy red velvet centers and creepy “bloody” finish, they’re sure to impress kids and adults alike.
Whether you’re setting up a dessert bar, handing out party favors, or simply making a batch to enjoy at home, these cake pops add the right mix of festive flair and sweet indulgence. They prove that Halloween desserts don’t have to be complicated to be memorable—they just need a little creativity and a touch of spooky charm.
Follow me on Facebook and Pinterest where I share cozy, easy-to-make baking recipes just like this one.
Print
Bloody Red Velvet Cake Pops
- Total Time: 1 hour 5 minutes
- Yield: 24 cake pops 1x
- Diet: Vegetarian
Description
Bloody Red Velvet Cake Pops are spooky Halloween treats made with red velvet cake, cream cheese frosting, and a white chocolate coating with red candy drizzle.
Ingredients
- 1 box red velvet cake mix (plus ingredients listed on box)
- ½ cup cream cheese frosting
- 2 cups white candy melts
- ¼ cup red candy melts or red gel icing
- Cake pop sticks
- Optional: candy eyes, black sprinkles, Halloween sprinkles
Instructions
1. Bake red velvet cake and cool completely.
2. Crumble cake into fine crumbs.
3. Mix crumbs with cream cheese frosting until dough forms.
4. Shape into 1-inch balls and chill for 1 hour.
5. Dip sticks in melted white chocolate, insert into cake balls, and chill again.
6. Coat each cake pop in melted white candy melts.
7. Drizzle with red candy melts or gel icing to create a bloody effect.
8. Decorate with candy eyes or Halloween sprinkles.
Notes
Chill cake pops before dipping to prevent them from falling apart.
Thin candy melts with coconut oil if too thick.
Store pops in the fridge for up to 1 week or freeze undecorated for up to 2 months.
- Prep Time: 30 minutes
- Cook Time: 35 minutes
- Category: Dessert
- Method: Baking
- Cuisine: American
Nutrition
- Serving Size: 1 cake pop
- Calories: 160
- Sugar: 16g
- Sodium: 120mg
- Fat: 8g
- Saturated Fat: 4g
- Unsaturated Fat: 3g
- Trans Fat: 0g
- Carbohydrates: 22g
- Fiber: 1g
- Protein: 2g
- Cholesterol: 20mg
